Take your TikTok ad performance to the next level by combining Pixel and Events API tracking. This guide helps you understand the why and how.
Using only the traditional TikTok Pixel (browser-side tracking) means your data is vulnerable to:
Cookie blockers & Ad blockers
iOS 14+ tracking restrictions
Connectivity issues
That’s where Events API comes in. It sends events from the server-side, ensuring that your conversions are still captured—even when the Pixel is blocked.
By combining both, you:
Improve event tracking accuracy
Boost ROAS with better data matching
Reduce ad costs by optimizing for higher-quality audiences
When Pixel and Events API work together, you maximize coverage and signal quality for TikTok’s algorithms.
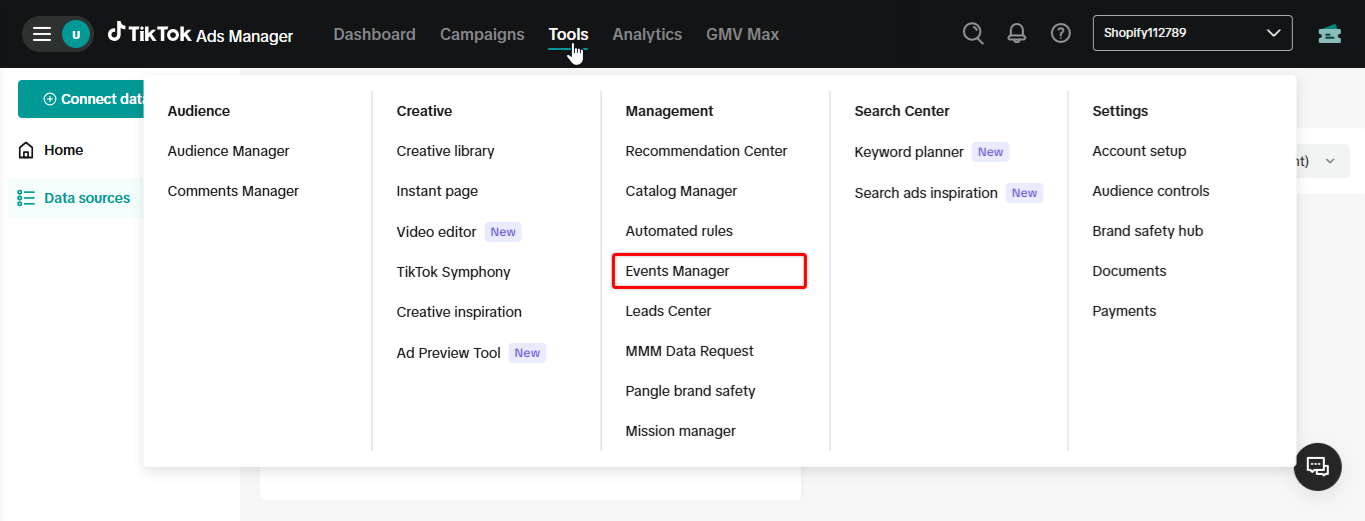
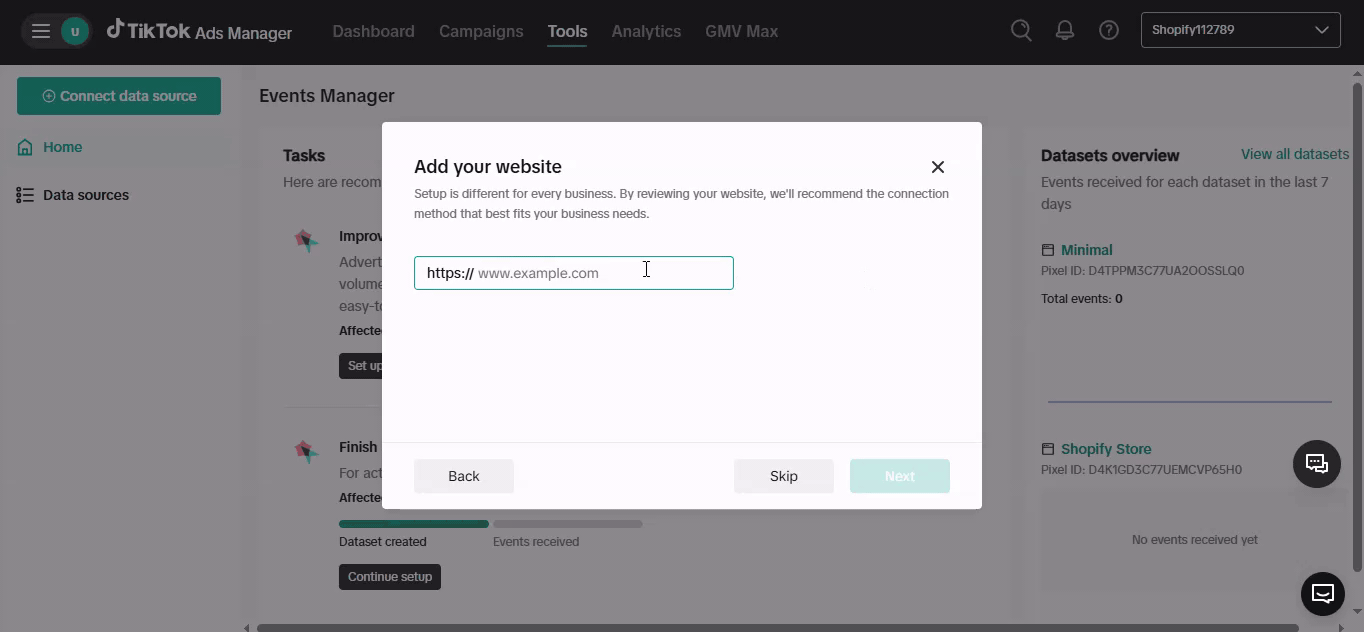
Step 1. In your TikTok Ads Manager, click on Tools ➞ Events
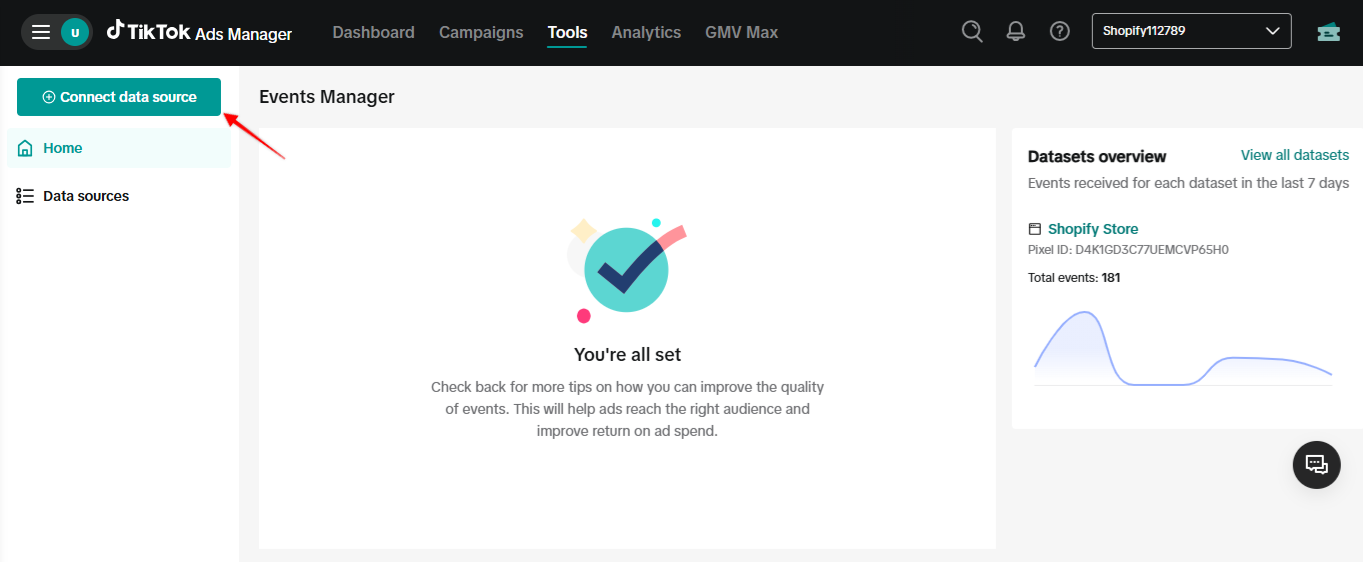
Step 2. Click on Connect Data Source
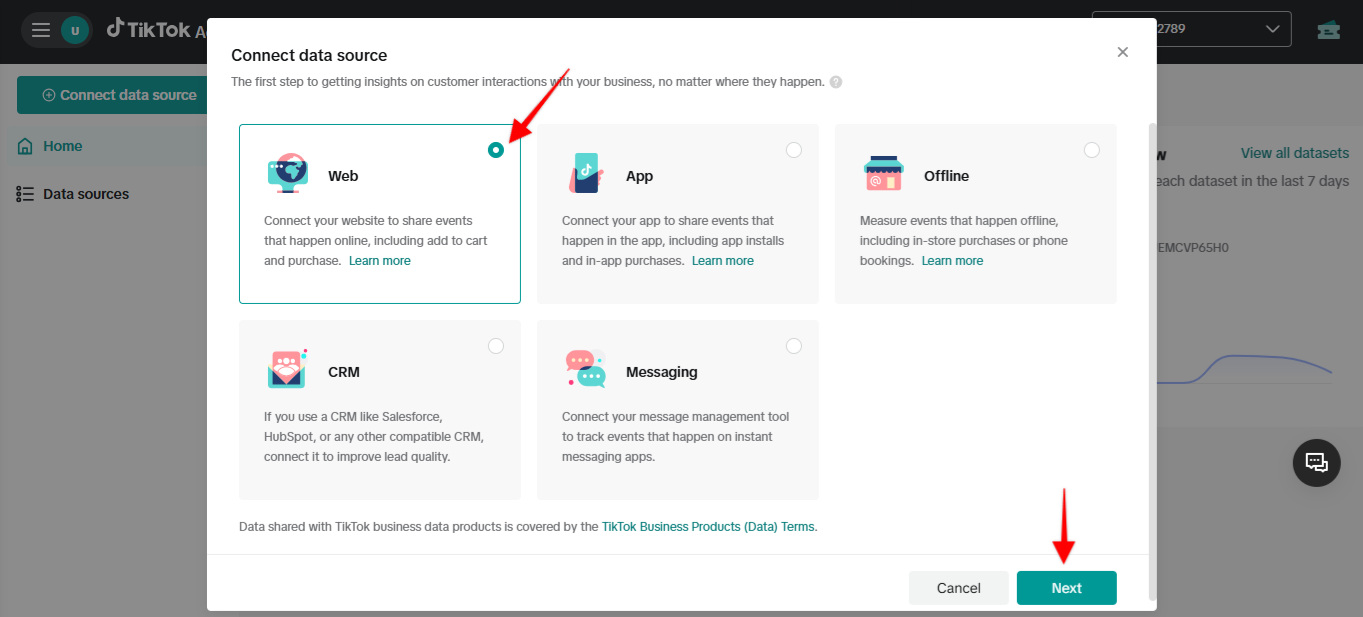
Step 3. Ensure you select “Web” as the platform
Step 4. Add your website → Select Manual setup → Choose TikTok Pixel + Events API connection method. Enter your Pixel name and complete the remaining steps, then click Finish.
Try these simple tips to make your tracking setup work even better:
Use Test Events in TikTok Events Manager to verify server + browser events are received correctly
Prioritize high-signal events like Purchase, Initiate Checkout, and Add Payment Info for optimization
Avoid duplicates: Our app deduplicates browser/server events by default using event_id
With increasing privacy restrictions, server-side tracking (Events API) is essential for any advertiser. When you use both TikTok Pixel and Events API together, you’ll get more complete and accurate data—helping you run better ads and grow your business with confidence.